LED Panel Widget for OS X Dashboard
- published:
- 2006.04.06
- topics:
- apps
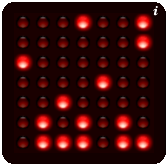
Influenced by the movie WarGames, I've always wanted a big array of red blinken lights. When I discovered that OS X Dashboard Widgets were essentially just Javascript, HTML, and CSS, I somehow found the motivation to make a virtual LED Panel. I knew I wanted it to look like something that belonged on the side of a 1983 supercomputer, and I knew it had to be very scriptable.
Incidentally, it is kind of funny and appropriate that the original WOPR display from the movie WarGames was really just an Apple II in a painted wood box.
This is pre-1.0 software. I apologize in advance for any bugs or for breaking your scripts when you upgrade.
Feel free to contact me if you have found any bugs or would like to request a feature. I'm also very interested to know if you've managed to script the LED Panel to do something interesting.
Documentation
This documentation ONLY applies to the latest version. Make sure you are up to date.
- Use
- Programming the Panel (Updated 2006.04.23)
- Examples
- Further Help
Use
On the flip side of the panel you will find a place to enter URLs. Some of URLs use made-up protocols (led: and script:), others are real protocols (http:// and file://) that are fetched using an XML HTTP Request (AJAX).
In order to make the LED Panel do something, you need to point it at one of the following:
- A script on a web server: http://www.domain.com/yourfile.php
- A static file on a web server: http://www.domain.com/yourfile.html
- A static file on your local computer: file:///path/to/your/file.html
- A shell script on your local computer: script:/path/to/your/script.led
- A built-in command: led:clock
Select or enter a URL in the field on the flip side of the widget, and then press the "Load URL" button. Alternatively, you can drag and drop your local HTML files or .led scripts onto the Panel widget. You can find even more detailed help about how to use these different types of URLs in the Further Help section.
Built-in Commands (led:)
Here are some details about using the built-in commands.
- led:clock - This is a built in binary clock. (No seriously, that thing tells time.)
- led:clear - Wipe out whatever is displayed on the Panel.
- led:stop - Stop the Panel's execution.
- led:start - Start the Panel's execution (after a stop).
- led:intro - Display that intro you see when you drop the widget on your Dashboard.
- led:invader - Draw the image used by the intro.
- led:marquee size delay "message" - Scrolls message across the panel. The panel will be size letters wide. Set the delay in milliseconds (1000 milliseconds = 1 second). Smaller numbers are faster. Your message must be in double quotes. If you wish to have a double quote or a backslash in your message, you must escape them: \" and \\ ...I will warn you that I'm not currently sleeping my widget when you hide the dashboard, and the marquee tends to eat a fair amount of CPU.
- led:paint width height - Click on LEDs to toggle on/off states and draw a picture. You can supply a width and height to set the size of the Panel before you draw on it.
- led:scroll delay duration - This will scroll whatever LEDs are displayed on your panel. The default direction is now from right to left. You can specify a negative delay to scroll left to right. The delay is actually the number of milliseconds until the next tick, so smaller numbers are faster. If the duration is zero or not specified, it will scroll until you stop it or load a different URL. Otherwise, you can specify a duration (in milliseconds) and the panel will scroll for that long.
Programming the Panel
Whatever URL you point your LED Panel at, the file you reference must contain, or the script you call must generate, an HTML unordered list with 7 list items. Example script output / static file content is below. I've included some comments for your reference... however, don't put comments inside the list items. Bad things will happen.
<ul>
<!-- Horizontal # of LEDs -->
<li>8</li>
<!-- Vertical # of LEDs -->
<li>8</li>
<!-- LED states bit field -->
<li>10101010
10101010
10101010
10101010
10101010
10101010
10101010
10101010</li>
<!-- Next URL to load -->
<li>http://www.domain.com/ledpanel/myledboard.php</li>
<!-- Time until refresh in milliseconds, 0 means do not refresh. -->
<!-- Put [persistent] after the numerical value if you want your Panel -->
<!-- to keep processing while the Dashboard is hidden. -->
<li>1000</li>
<!-- URL to load if an LED is clicked -->
<li>http://www.domain.com/ledpanel/myclickhandler.php</li>
<!-- URL to open in browser window -->
<li>http://www.domain.com/index.html</li>
</ul>
So, here are some more elaborate details of our 7 list items:
- An integer representing how many LEDs to put horizontally on a row for your panel. For reasons of sanity, values are limited from 1 to 64.
- An integer representing how many LEDs to put vertically in a column for your panel. For reasons of sanity, values are limited from 1 to 64.
- Bit values of 1 and 0, representing the on and off states of your LEDs respectively. These states map left to right, top to bottom. Any characters (such as space) other than 1s and 0s are simply ignored and do not affect output. If your Panel is 8 x 8, and you do not supply 64 states, any LEDs that did not have a state specified will retain any previous state.
- The next URL your panel should load. This can be ANY of the supported URL types (led:, script:, http://, etc.). The next URL's content should contain another unordered list of these 7 data items so the process can continue. This is how you will accomplish animation. You can leave this field empty if your refresh field (item 5) is set to 0.
- An integer representing the time in milliseconds (1000 milliseconds = 1 second) to wait until loading the URL specified in item 4. If this value is zero, execution will STOP. Other than 0, values are limited to 50 milliseconds or more for reasons of sanity. By default, the Panel will stop processing when the Dashboard is hidden. If you want your Panel to continue execution while in the background include the string [persistent] after the numerical value ( e.g. 1000 [persistent]).
- The URL your panel should load if you click on an LED. This URL's content should contain another unordered list of these 7 data items so the process can continue. URLs fetched via an AJAX call (http:// and file://) will be appended with a GET variable / query string variable named i set to the zero-indexed number of the LED that was clicked. So, if you have an 8x8 LED Panel, and the very top-left LED was clicked, the variable i will be set to 0. If the LED immediately below that is clicked, i will equal 8. If the bottom-right most LED is clicked i will equal 63. URLs calling local shell scripts (script:) will have
i=plus the zero-indexed number of the LED clicked passed to the script as an argument. So, using our previous examples:i=0,i=8, ori=63. If this field is left empty, clicking on LEDs will have no effect. - This is the URL that should immediately pop open in a browser window. Your LED Panel will continue to run if you specify a refresh time and the next URL, but Dashboard will be dismissed and a web browser will come to the foreground and load this URL. Leave this field empty if you do not wish to do this.
Examples
How to Use These Examples
Unless otherwise stated, this is all you need to do:
- Download the script to your Desktop (or someplace where you can find it). Make sure that it is saved with a .led extension, paint.led for example.
- Type script: and script's path and file name in the URL field of your LED Panel widget, script:~/Desktop/paint.led for example, and click the "Load URL" button. Or even easier, simply drag the file and drop it on the Panel.
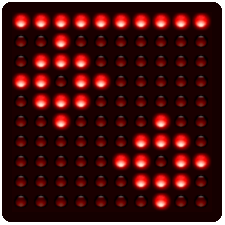
Paint Script
Demonstrates local script support, handling clicks on the LED panel, and programmatically passing arguments back to your scripts.
This script enables you to draw on your Panel by clicking the LEDs. You can also change the size of your painting surface through the arguments. Type this in your URL field: script:~/Desktop/paint.led 15 20 and your drawing surface will be 15 LEDs wide and 20 LEDs tall.
Fortune Script

Demonstrates calling built-in commands from your own scripts.
This script picks a random fortune, and uses the built in led: marquee command to scroll the random fortune across your panel. This script works equally well remotely. Go ahead and upload the file to your web server and rename it to fortune.php (or whatever your server requires) and point your LED Panel at the URL.
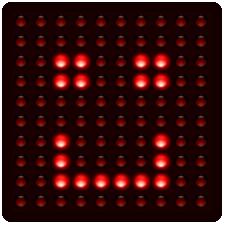
Conway's Game of Life Script
Demonstrates animation and user interaction.
This is an implementation of Conway's Game of Life on the LED Panel. Click on the panel to place the original cells, and then click the red bar at the top of the panel to begin simulating. You can also click the red bar again to stop the simulation and add more cells.
Try drawing in some of the patterns from the Wikipedia page to start out with.
Further Help
Local Scripts (script:)
Your script needs to output an HTML unordered list to tell the LED Panel what to display, which is explained in the Programming the Panel section. Here are some quirks about using local shell scripts (script:) you should know:
- Local script file names must end in .led or they won't work.
- Whatever is after script: is going to be passed to your file system in order to locate your script. Widget's don't know your $PATH information, so you're going to have to use an explicit path to your script, such as: script:~/Desktop/yourscript.led or script:/Users/bob/Documents/yourscript.led
- You do not have to escape spaces in your script's path or filename. Both of these will work: script:/apple/red delicious/script.led or script:/apple/red\ delicious/script.led
- I've artificially limited the characters you can use for your paths and filenames to the following: - . _ ~ 0-9 a-z A-Z slashes and spaces.
- You may follow the path and name of your local shell script with any arbitrary text. For example: script:~/Desktop/myscript.led They said, "where's our $10?!" is valid. ALL of this text will be passed to your shell script as its first argument. Characters that have special meaning to the shell are escaped and reach your script with their literal value. Using our example, if myscript.led was a standard shell script using /bin/sh, then $1 would be set to They said, "where's our $10?!" for you to do as you please.
- If you are using a script as the target URL for handling clicks on LEDs in the panel, then
i=plus the zero-indexed number of the LED will be passed to your script as an argument. If you are not passing your script any argument, this information will be the first argument of your script. If you are passing an argument to your script (you put arbitrary text after your script's path and name in the URL field) then the click information will be the second argument of your script. As an example,i=12might be passed to your script as an argument. - If you get a "permission denied" error you probably need to set your script file to executable. chmod 755 myscript.led or the like.
Real URLs (http://, file://, https://)
The URL you specify must supply an HTML unordered list to tell the LED Panel what to display, which is explained in the Programming the Panel section. Here are some tips:
- file:// - This URL form points to files on your local system. You need to follow file:// with a complete path to the file on your local system. For example, if you've got an HTML file in your documents folder, you'd need to provide a URL like: file:///Users/bob/Documents/myfile.html - notice the three slashes at the beginning. Also, any spaces in your path or file name must be replaced with %20 like this: file:///Users/bob/My%20Folder/myfile.html for example. This file has to be static content. Don't use file:// to point at scripts. If your file:// URL isn't working, try pasting it into your browser window. You should see your file loaded. If it doesn't work in your browser window it won't work in the LED Panel.
- http:// - Point to any web server on the interlink or that you are running locally. If the URL you supply doesn't work in your web browser window, it isn't going to work in the LED Panel.